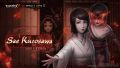
Sae Kurosawa
| ||
| "Dear sister... are you leaving me again?" | ||
| Japanese | 黒澤 紗重 くろさわ さえ | |
| Alias | Bloody Kimono or White Kimono (FF2) Girl in Bloody Kimono (DCB) | |
| Age | 15 | |
| Family | Ryokan Kurosawa (father) Yae Kurosawa (twin sister) | |
| Occupation | Twin Shrine Maiden | |
| Cause of Death | Hanging | |
| Date of Death | Night of the Repentance | |
| Encounter | Hellish Abyss | |
| Games | Fatal Frame II Deep Crimson Butterfly Crimson Butterfly Remake | |
| Other Appearances | Zero4D Identity V | |
| Notes | Butterfly Diary Final Letter Blood-splattered Notes | |
| Spirit Stone | Fluorite Sae's Sparkling Spirit Stone | |
| Themed Menu Item | Sae Kurosawa's strawberry yogurt[1] | |
| Japanese Voice Actor | Ayako Kawasumi | |
| English Voice Actor | Kim Mai Guest (FF2) Patricia Gannon (DCB) | |

Sae Kurosawa is the main antagonist in Fatal Frame II, Fatal Frame: Deep Crimson Butterfly, and Fatal Frame II: Crimson Butterfly Remake. She was the last twin sacrificed, whose failed ritual was the final straw that caused the Repentance to occur, wiping All God's Village from the map in one horrific night.
Past
Sae was born in All God's Village along with her twin sister Yae. The girls were the only children of Ryokan Kurosawa, the acting Ceremony Master at the time of the Repentance. Although Sae was born first, she was considered the younger and weaker twin based on the belief system of the village. Unable to bear the thought of the girls' eventual fate, their mother threw herself into the Abyss. Their father tried to give them a happy childhood without any pain or loneliness,[2] but given the social status of twins in the village, it is likely that the twins had very few friends except each other growing up. However, they were close to the Tachibana twins, Itsuki and Mutsuki, and they also befriended Ryozo Munakata, the son of a peddler who visited the village occasionally. On one of his visits, Ryozo took Yae and Sae to visit a stream just outside the village. Having been told all their lives that the world beyond the village was corrupt,[3] Yae and Sae were captivated by its beauty, and while there, they made a promise to each other to be together forever.[4]
When Sae and Yae were 14, Itsuki and Mutsuki performed the Crimson Sacrifice Ritual, but their Ceremony was unsuccessful. The responsibility then fell on Sae and her sister to complete the ritual one year later. It is unknown how much the twins were told about the ritual beforehand. Since their father was the ceremony master and their friend a Remaining, however, they probably knew what the ritual entailed. Sae, realizing that in time she and Yae would grow apart, wanted nothing more than to complete the ritual and "become one" with her sister. Yae, however, was opposed to the ritual, believing it cruel and unnecessary. With Itsuki's help, she planned on escaping with Sae. Sae went along with the idea only because Yae wished it.

While Sae and Yae were undergoing their cleansing to prepare for the ritual, Ryozo Munakata returned to the village, along with his teacher, the folklorist Seijiro Makabe. The visitors were greeted by the Kurosawa Family, and treated well. Seijiro took a photo of Sae and Yae with the Camera Obscura. Sae's face showed up horribly blurred in the photo, and she remarked that such was "interesting to see."[5] Despite the initial warm welcome given to the visitors, Sae and Yae believed their father was planning on using the men as Kusabi sacrifices.[6] They took Seijiro a map showing a side door leading out of the house and the key to unlock it. They warned him that the Hidden Ceremony was approaching and told him to leave during the night. Seijiro sent Ryozo away but stayed behind, ultimately to be sacrificed. Before leaving, Ryozo whispered to Yae that he would return for her and Sae on the night of the ceremony. Sae mused in her diary that her and Yae's completion of the ritual would appease the Hellish Abyss and prevent people from having to suffer further.

When the time came, Itsuki led the girls into the forest and showed them the path out of the village. He told them to go ahead of him and warned them not to look back as Sae looked back at her friend one last time. Yae followed the forest path without looking back, while Sae struggled to keep up, begging Yae to not leave her. As she fell further and further behind, Sae understood that even if they escaped, she and Yae might eventually grow apart and die separately. At that moment of realisation, her foot slipped and she fell down the cliff.[7] A mob of villagers soon found her and took her back to the village. She waited for Yae's return, insisting that her sister would come back for her.

While waiting for Yae's return, Sae went to see Itsuki one last time before the festival, by visiting the Storehouse where he was locked in as punishment for helping her and Yae escape. Upon entering the building, she discovered Itsuki had committed suicide by hanging himself. She cried, blaming herself and saying, "If it was to come to this... we should have done the ritual." She resolved to complete the ritual alone.
Although no Twin Shrine Maiden had ever completed the ritual alone, Ryokan was growing desperate because of the rumbling from the Abyss. He decided to go ahead and perform the ritual with Sae alone, hoping she could appease the Abyss. In another of her diaries, Sae wondered if she would be able to become a butterfly without Yae. Still, she hoped that Yae would come back in time and complete the ritual with her.

A group of Veiled Priests escorted Sae to the ritual site. On the way she dropped a note for Yae to find, saying she would wait until the very end. As the priests approached the Abyss, Sae hesitated, but was pushed on. The priests hung her from the very last Torii Gate, and the Mourners threw her lifeless body into the Abyss. Since the sacrifice was not properly performed, however, the ritual failed and the Repentance occurred. A huge wave of Darkness burst forth from the Abyss, covering the entire village and killing many villagers in its path.

The vengeful ghost of Sae emerged from the Abyss, filling the night with her maniacal laughter as the Kusabi began to slaughter all those within sight. After killing everyone in the Kurosawa House, they proceeded to massacre the surviving villagers. Sae's spirit bore a bloodstained kimono and a rope mark on her neck. She continued to wait in the carnage for Yae's return.
Fatal Frame II
In 1988, the Amakura twins, Mio and Mayu, became trapped in the village. Sae's spirit possessed Mayu and urged Mio, who was possessed by Yae, to complete the ritual. This was not a random possession, or merely because Mayu was a twin, but because Mayu and Sae both harboured similar feelings.[8] Although Mayu had not been raised as a shrine maiden, her feelings overlapped with Sae's, until both ended up standing by the Abyss, waiting to perform the ritual.[9] When Mio arrived at the Abyss to save her sister, she and Mayu ended up completing the Crimson Sacrifice Ritual in the Kurosawa twins' stead. Their ritual was successful, and Sae's spirit, as well as her curse, was finally put to rest.
Alternate Endings

Instead of following Mayu into the Kurosawa House, Mio exits the village through the Kureha Shrine. Sae's ghost pursues and grabs Mio who then wakes up alone. Mayu and Sae's voices are heard vowing to wait for their sisters forever.

Instead of causing Mio to perform the ritual, Sae's vengeful spirit attacks her. After Mio defeats Sae with the Camera Obscura, Sae's ghost splits from Mayu. Mio rushes forward and grabs Mayu's hand, saving her, while Sae plummets into the Abyss with a shrill scream.

As Mio runs down to the Hellish Abyss to find her sister, Mio's body 'splits' and the spirit of Yae bursts forth from her. Yae apologizes to her sister for running away, and the two hold hands as their red ceremonial rope reforms around their waists. Together, hand in hand, both jump into the Abyss, as Mio narrowly manages to pull Mayu from Sae's body. The two emerge as a single crimson butterfly, the curse is lifted, and the spirits of everyone who have died in the village are released.
Mio defeats Sae's vengeful spirit, but Mayu and Mio both fall into the Abyss. As they float in darkness, their forms dissolving, Yae and Sae emerge from their bodies and help them to join hands. As the twins embrace, two butterflies are born, and the ritual is complete. Crimson butterflies swarm through the village, purifying the darkness. Yae and Sae are reunited, and are last seen standing hand in hand by the Abyss, raising their faces to the daylight.
Fatal Frame III
Although her spirit was no longer actively haunting the village and bringing in people to it, she still appears briefly in one of Kei's dream sequences into the Manor of Sleep, surrounded by bodies in the Great Hall.
Gallery
-

-
 Sae as she appears in the 2022 Identity V crossover event.

Misc. Info
- Sae is one of the very few enemies in the series that instantly kills with one touch.
- Sae's blood-soaked kimono is an unlockable costume for Mayu Amakura in Fatal Frame II.
- Sae's ghost appears in two forms, a vengeful spirit called Bloody Kimono and a sad apologizing spirit called White Kimono.
- Kurosawa is the last name of famous Japanese director Akira Kurosawa, who Fatal Frame creator Keisuke Kikuchi has mentioned is one of his favorite directors.
- Ultimately, Sae shares a similar death to her sister, as both were hanged, although Yae's hanging was suicide.
- Sae wears her kimono the 'dead' way, right over left. In Japan, this is only done for burial when one is deceased.
- In December 2022, Sae will make an appearance as a Hunter in a special crossover event for the multiplayer horror game Identity V. She is a costume for Geisha, also known as the Red Butterfly.
See Also
- For quotes by Sae, see Quotes: Sae Kurosawa.
- For other members of the Kurosawa family, see Kurosawa Family.
- For other shrine maidens, see Shrine Maiden.
- For other rituals in Fatal Frame II, see Fatal Frame II Rituals.
- For other antagonist ghosts in the Fatal Frame Series, see Antagonist Ghosts.
- For other twin pairs, see Twins.
- For images related to Sae, see Images of Sae Kurosawa.
- For Fan Theories related to Sae, see Theory: Sae Kurosawa.
References
- ↑ KOEI TECMO Cafe and Dining Zero Series Collaboration
- ↑ Ceremony Master's Note 3, Fatal Frame II
- ↑ Bound Diary 7, Fatal Frame II: Crimson Butterfly Remake
- ↑ Butterfly Diary 7, Fatal Frame II: Crimson Butterfly Remake
- ↑ Butterfly Diary 1, Fatal Frame II
- ↑ Butterfly Diary 2, Fatal Frame II
- ↑ Fatal Frame II Hard Mode Ending: Sae's Feelings, Fatal Frame Fanbook, p24-25. (English translation)
- ↑ Fatal Frame II Endings, Fatal Frame Fanbook, p22-25. English translation
- ↑ Deep Crimson Butterfly: Endings Explained, Zero Shinku no Chou Walkthrough and Data Collection Book, p102-111. English translation